添加依赖
导入头文件
#import <MyLayout/MyLayout.h>
ViewController.m
#import <MyLayout/MyLayout.h>
#import "ViewController.h"
#import "SettingController.h"
@interface ViewController ()
@property(nonatomic, strong) UIView *container;
@property(nonatomic, strong) UIButton *phoneLoginButton;
@property(nonatomic, strong) UIButton *primaryButton;
@end
@implementation ViewController
- (void)viewDidLoad {
[super viewDidLoad];
MyRelativeLayout *container = [MyRelativeLayout new];
container.backgroundColor = [UIColor whiteColor];
container.leadingPos.equalTo(@(MyLayoutPos.safeAreaMargin)).offset(16);
container.trailingPos.equalTo(@(MyLayoutPos.safeAreaMargin)).offset(16);
container.topPos.equalTo(@(MyLayoutPos.safeAreaMargin)).offset(16);
container.bottomPos.equalTo(@(MyLayoutPos.safeAreaMargin)).offset(16);
[self.view addSubview:container];
UIImageView *logo = [UIImageView new];
logo.image = [UIImage imageNamed:@"Logo"];
[container addSubview:logo];
logo.myWidth = 100;
logo.heightSize.equalTo(@(100));
logo.myTop = 100;
logo.myCenterX = 0;
#pragma mark - 底部容器
MyLinearLayout *bottomContainer = [MyLinearLayout linearLayoutWithOrientation:MyOrientation_Vert];
bottomContainer.myWidth = MyLayoutSize.fill;
bottomContainer.myHeight = MyLayoutSize.wrap;
bottomContainer.myBottom = 0;
bottomContainer.gravity = MyGravity_Horz_Center;
bottomContainer.subviewSpace = 30;
[container addSubview:bottomContainer];
#pragma mark - 底部容器
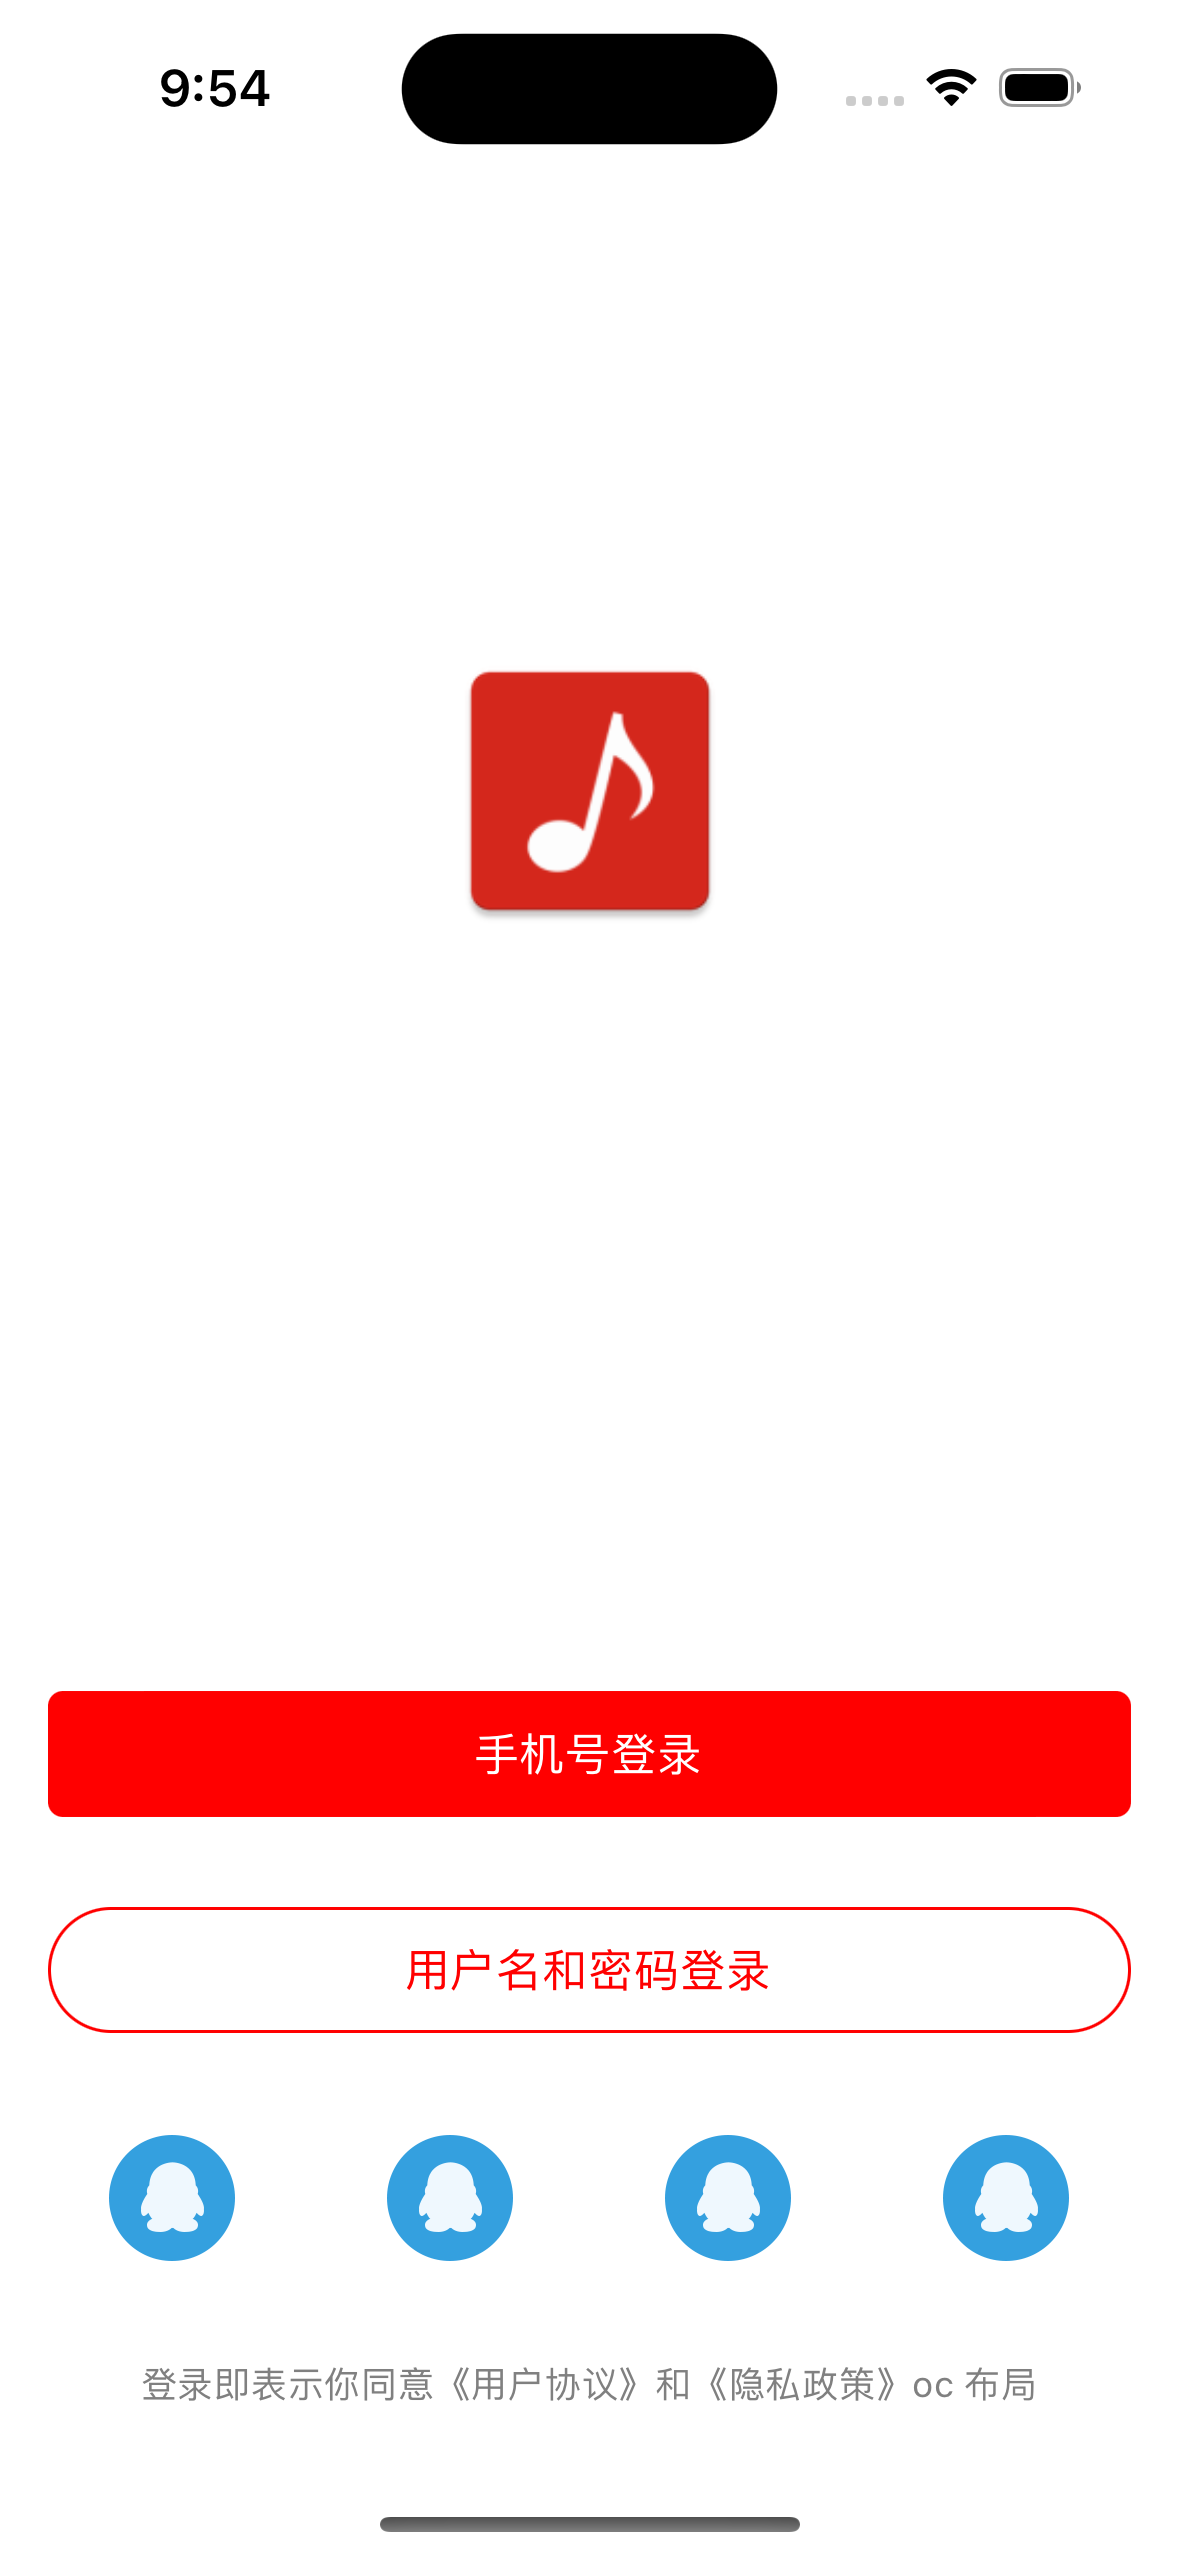
self.phoneLoginButton = [UIButton buttonWithType:UIButtonTypeSystem];
[self.phoneLoginButton setTitle:@"手机号登录" forState:UIControlStateNormal];
[self.phoneLoginButton addTarget:self action:@selector(phoneLoginClick:) forControlEvents:UIControlEventTouchUpInside];
self.phoneLoginButton.backgroundColor = [UIColor redColor];
self.phoneLoginButton.layer.cornerRadius = 5;
[self.phoneLoginButton setTitleColor:[UIColor whiteColor] forState:UIControlStateNormal];
[self.phoneLoginButton setTitleColor:[UIColor grayColor] forState:UIControlStateHighlighted];
[bottomContainer addSubview:self.phoneLoginButton];
self.phoneLoginButton.myWidth = MyLayoutSize.fill;
self.phoneLoginButton.myHeight = 42;
#pragma mark - 主登录按钮
self.primaryButton = [UIButton buttonWithType:UIButtonTypeSystem];
[self.primaryButton setTitle:@"用户名和密码登录" forState:UIControlStateNormal];
[self.primaryButton setTitleColor:[UIColor redColor] forState:UIControlStateNormal];
[self.primaryButton addTarget:self action:@selector(primaryButtonClick:) forControlEvents:UIControlEventTouchUpInside];
self.primaryButton.backgroundColor = [UIColor clearColor];
self.primaryButton.layer.cornerRadius = 21;
self.primaryButton.layer.borderWidth = 1;
self.primaryButton.layer.borderColor = [UIColor redColor].CGColor;
[bottomContainer addSubview:self.primaryButton];
self.primaryButton.myWidth = MyLayoutSize.fill;
self.primaryButton.myHeight = 42;
#pragma mark - 登录按钮
MyBaseLayout *otherLoginContainer = [[MyLinearLayout alloc] initWithOrientation:MyOrientation_Horz];
otherLoginContainer.myWidth = MyLayoutSize.fill;
otherLoginContainer.myHeight = MyLayoutSize.wrap;
otherLoginContainer.gravity = MyGravity_Vert_Center;
otherLoginContainer.subviewSpace=10;
[bottomContainer addSubview:otherLoginContainer];
for (NSInteger i=0; i<4; i++) {
UIButton *buttonView=[UIButton new];
[buttonView setImage:[UIImage imageNamed:@"LoginQqSelected"] forState:UIControlStateNormal];
[otherLoginContainer addSubview:buttonView];
buttonView.myHeight=50;
buttonView.weight=1;
}
#pragma mark - 协议
UILabel *agrementLabelView = [[UILabel alloc] init];
agrementLabelView.text = @"登录即表示你同意《用户协议》和《隐私政策》oc 布局";
agrementLabelView.font = [UIFont systemFontOfSize: 12];
agrementLabelView.textColor = [UIColor grayColor];
[bottomContainer addSubview:agrementLabelView];
agrementLabelView.myWidth = MyLayoutSize.wrap;
agrementLabelView.myHeight = MyLayoutSize.wrap;
}
-(void)phoneLoginClick:(UIButton *) sender {
NSLog(@"ViewController phoneLoginClick %@",sender);
SettingController *settingController = [[SettingController alloc] init];
[self.navigationController pushViewController:settingController animated:YES];
}
-(void)primaryButtonClick:(UIButton *) sender {
NSLog(@"ViewController primaryClick %@",sender);
}
@end
自定义 View
#import <MyLayout/MyLayout.h>
NS_ASSUME_NONNULL_BEGIN
@interface SettingView : MyLinearLayout
@property(nonatomic, strong) UIImageView *iconView;
@property(nonatomic, strong) UILabel *titleView;
@property(nonatomic, strong) UIImageView *moreIconView;
@end
NS_ASSUME_NONNULL_END
#import "SettingView.h"
@implementation SettingView
- (instancetype)init
{
self = [super initWithOrientation:MyOrientation_Horz];
if (self) {
[self innerInit];
}
return self;
}
- (void)innerInit {
self.myWidth = MyLayoutSize.fill;
self.myHeight = 55;
self.padding = UIEdgeInsetsMake(0, 16, 0, 16);
self.subviewSpace = 10;
self.gravity = MyGravity_Vert_Center;
self.backgroundColor = [UIColor whiteColor];
[self addSubview:self.iconView];
[self addSubview:self.titleView];
[self addSubview:self.moreIconView];
}
#pragma mark - 创建控件
- (UIImageView *)iconView{
if (!_iconView) {
_iconView=[UIImageView new];
_iconView.image=[UIImage imageNamed:@"Setting"];
_iconView.myWidth=20;
_iconView.myHeight=20;
}
return _iconView;
}
- (UILabel *)titleView{
if (!_titleView) {
_titleView=[UILabel new];
_titleView.text=@"设置";
_titleView.myWidth=MyLayoutSize.fill;
_titleView.myHeight=MyLayoutSize.wrap;
_titleView.weight=1;
}
return _titleView;
}
- (UIImageView *)moreIconView{
if (!_moreIconView) {
_moreIconView=[UIImageView new];
_moreIconView.image=[UIImage imageNamed:@"Arrow"];
_moreIconView.myWidth=20;
_moreIconView.myHeight=20;
}
return _moreIconView;
}
@end
#import <UIKit/UIKit.h>
NS_ASSUME_NONNULL_BEGIN
@interface SettingController : UIViewController
@end
NS_ASSUME_NONNULL_END
#import "SettingController.h"
#import "SettingView.h"
@interface SettingController ()
@property(nonatomic, strong) SettingView *settingView;
@property(nonatomic, strong) SettingView *collectView;
@end
@implementation SettingController
- (void)viewDidLoad {
[super viewDidLoad];
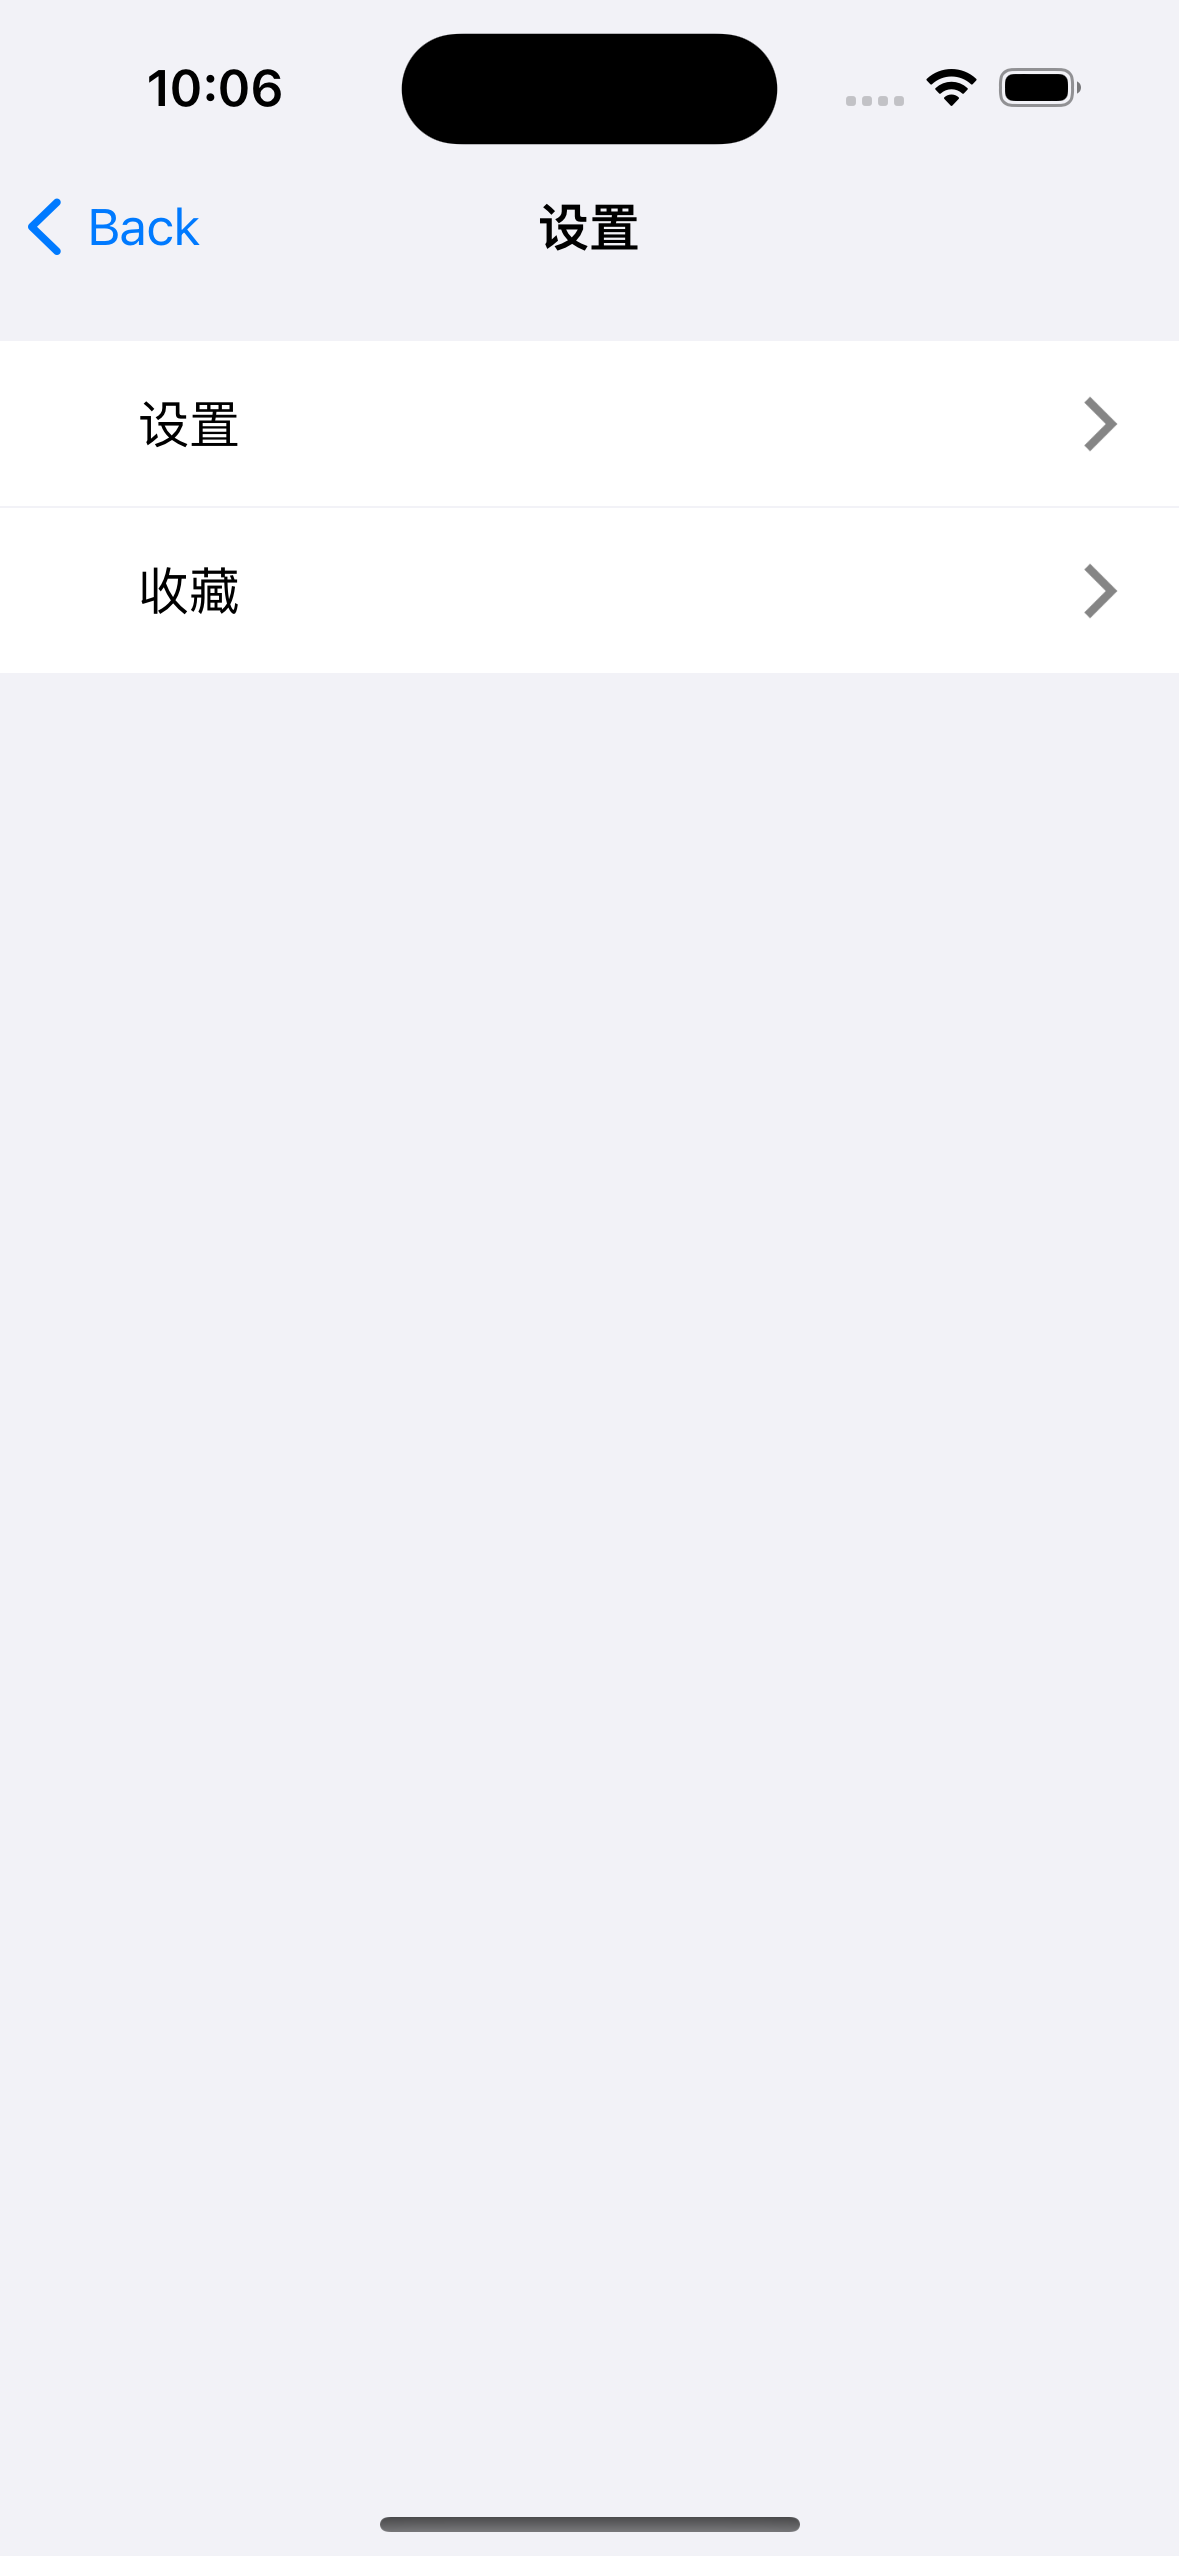
self.title = @"设置";
self.view.backgroundColor = [UIColor systemGroupedBackgroundColor];
MyBaseLayout *container = [MyLinearLayout linearLayoutWithOrientation:MyOrientation_Vert];
container.leadingPos.equalTo(@(MyLayoutPos.safeAreaMargin));
container.trailingPos.equalTo(@(MyLayoutPos.safeAreaMargin));
container.topPos.equalTo(@(MyLayoutPos.safeAreaMargin)).offset(16);
container.myHeight = MyLayoutSize.wrap;
container.subviewSpace = 0.5;
[self.view addSubview:container];
[container addSubview:self.settingView];
[container addSubview:self.collectView];
}
#pragma mark - 事件
-(void)settingTapGestureRecognizer:(UITapGestureRecognizer *)recognizer{
NSLog(@"SettingController settingTapGestureRecognizer");
}
#pragma mark - 控件
- (SettingView *)settingView{
if (!_settingView) {
_settingView=[SettingView new];
_settingView.titleView.text=@"设置";
UITapGestureRecognizer *tapGestureRecognizer = [[UITapGestureRecognizer alloc] initWithTarget:self action:@selector(settingTapGestureRecognizer:)];
[_settingView addGestureRecognizer:tapGestureRecognizer];
}
return _settingView;
}
- (SettingView *)collectView{
if (!_collectView) {
_collectView=[SettingView new];
_collectView.titleView.text=@"收藏";
}
return _collectView;
}
@end
添加依赖
ViewController.swift 文件
import UIKit
import TangramKit
class ViewController: UIViewController {
var container:UIView!
override func viewDidLoad() {
super.viewDidLoad()
view.backgroundColor = .white
self.container = TGRelativeLayout()
container.tg_top.equal(TGLayoutPos.tg_safeAreaMargin).offset(16)
container.tg_leading.equal(TGLayoutPos.tg_safeAreaMargin).offset(16)
container.tg_trailing.equal(TGLayoutPos.tg_safeAreaMargin).offset(16)
container.tg_bottom.equal(TGLayoutPos.tg_safeAreaMargin).offset(16)
view.addSubview(container)
let logoView = UIImageView()
logoView.tg_width.equal(100)
logoView.tg_height ~= 100
logoView.tg_top ~= 100
logoView.tg_centerX.equal(0)
logoView.image = UIImage(named: "Logo")
container.addSubview(logoView)
let bottomContainer = TGLinearLayout(.vert)
bottomContainer.tg_height.equal(.wrap)
bottomContainer.tg_width.equal(.fill)
bottomContainer.tg_bottom.equal(0)
bottomContainer.tg_gravity = TGGravity.horz.center
bottomContainer.tg_space = 30
container.addSubview(bottomContainer)
bottomContainer.addSubview(phoneLoginButton)
bottomContainer.addSubview(primaryLoginButton)
let otherLoginContainer = TGLinearLayout(.horz)
otherLoginContainer.tg_height.equal(.wrap)
otherLoginContainer.tg_width.equal(.fill)
otherLoginContainer.tg_gravity = TGGravity.horz.between
bottomContainer.addSubview(otherLoginContainer)
for _ in 0..<4 {
let buttonView = UIButton(type: .custom)
buttonView.setImage(UIImage(named: "LoginQqSelected"), for: .normal)
buttonView.tg_width.equal(.wrap)
buttonView.tg_height.equal(50)
otherLoginContainer.addSubview(buttonView)
}
let agreementLabelView = UILabel()
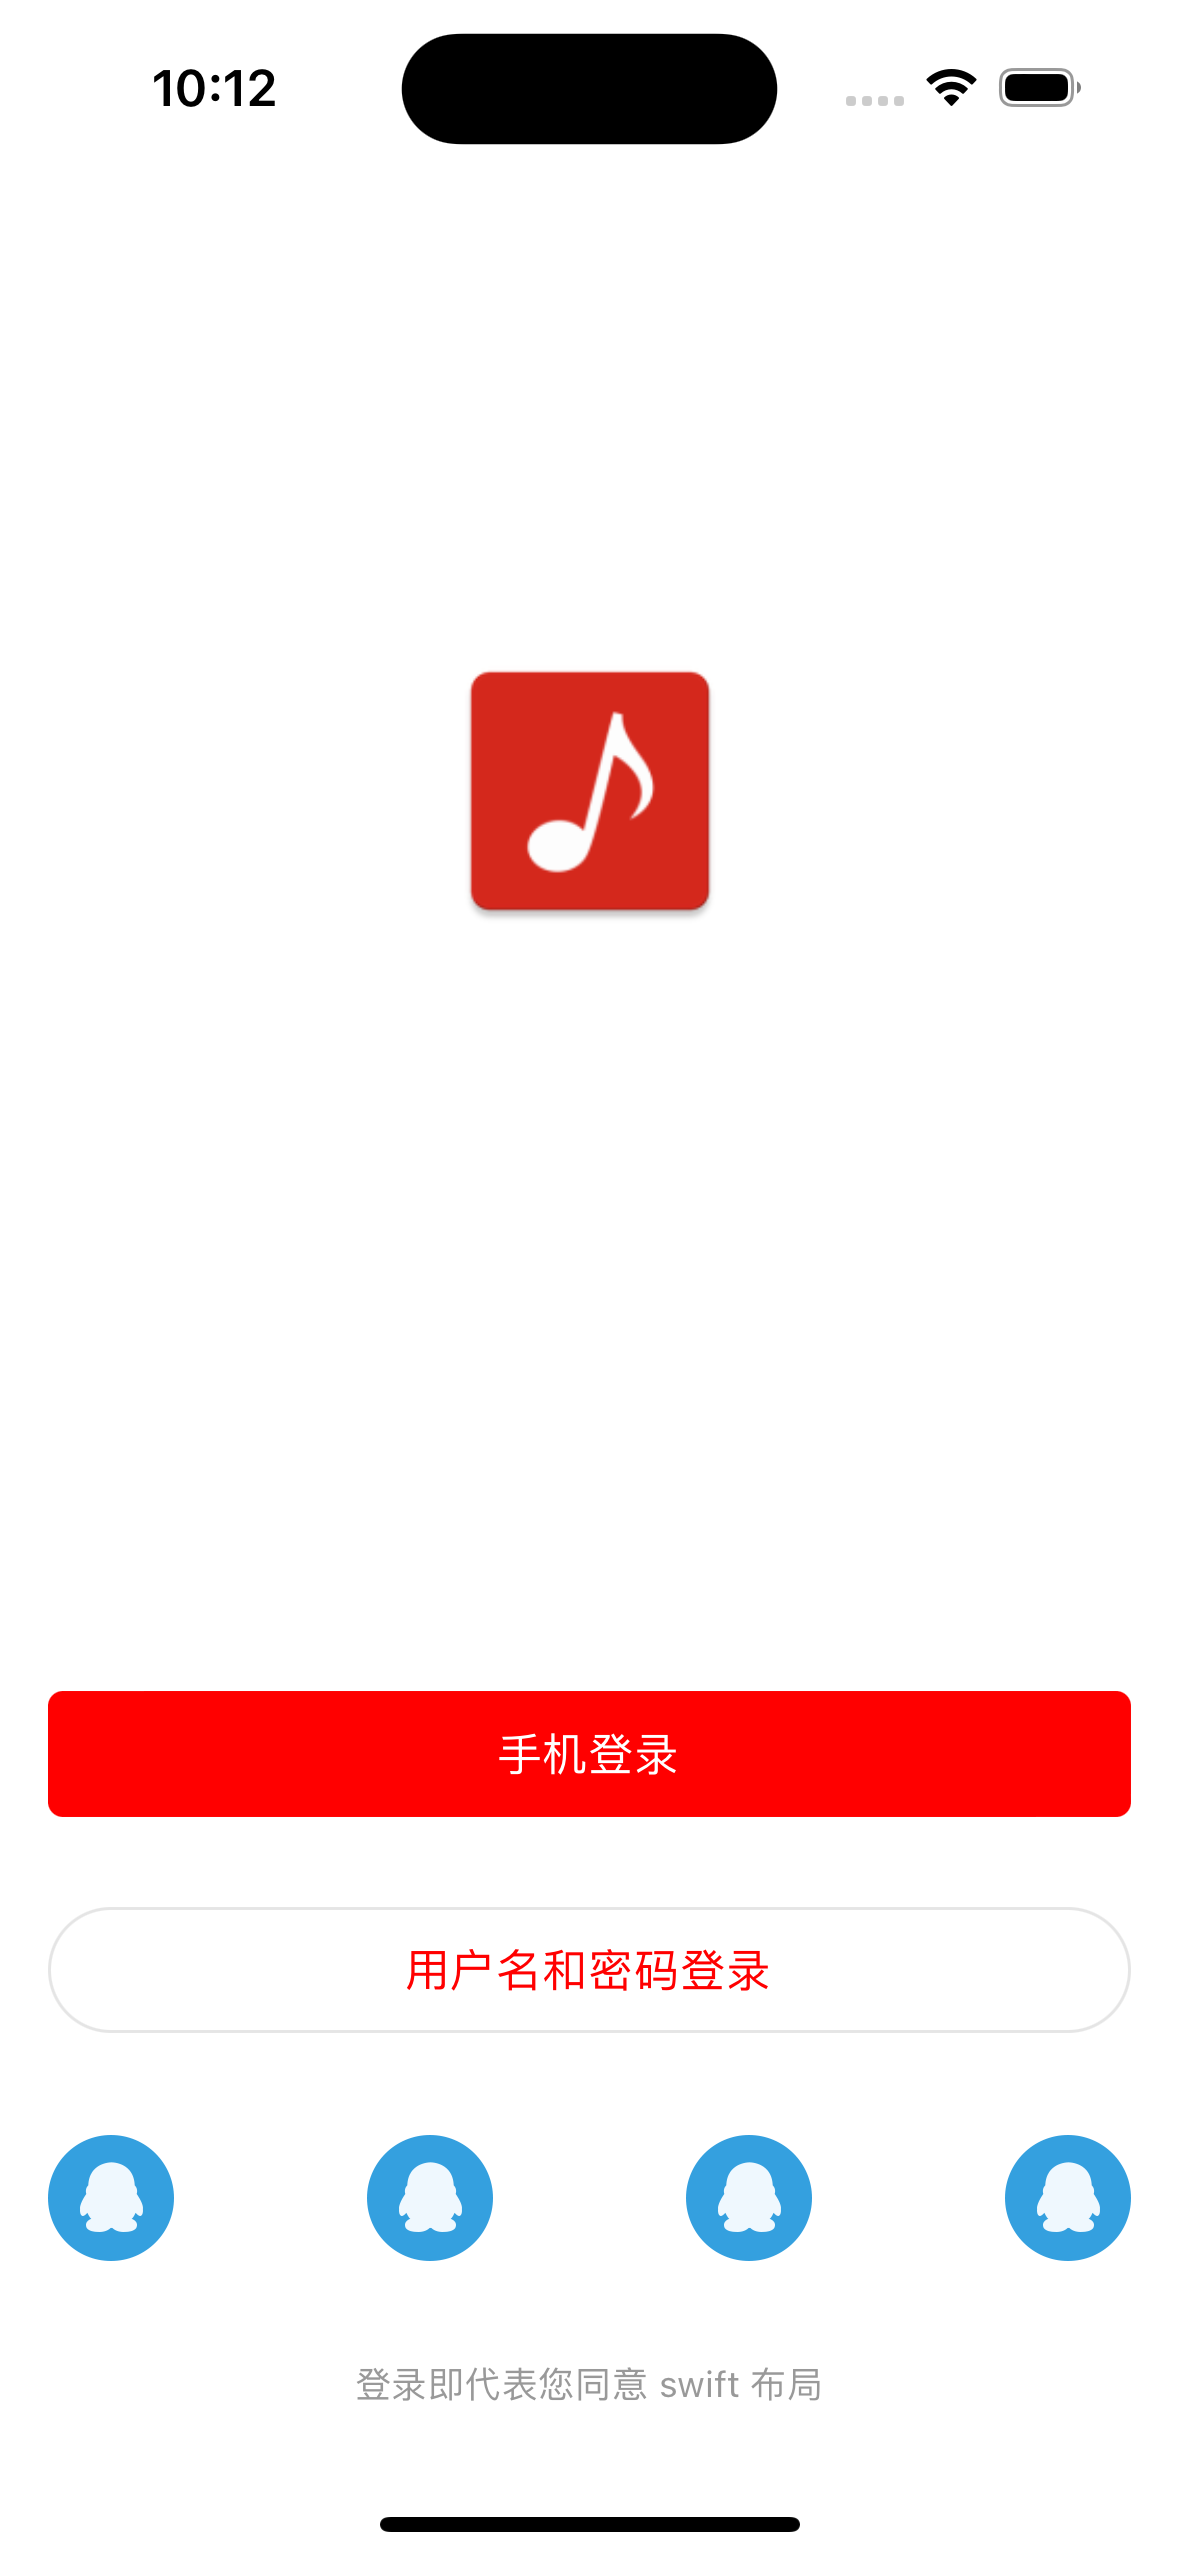
agreementLabelView.text = "登录即代表您同意 swift 布局"
agreementLabelView.font = UIFont.systemFont(ofSize: 12)
agreementLabelView.textColor = UIColor(red: 0.6, green: 0.6, blue: 0.6, alpha: 1)
agreementLabelView.tg_width.equal(.wrap)
agreementLabelView.tg_height.equal(.wrap)
bottomContainer.addSubview(agreementLabelView)
}
@objc func phoneLoginAction(_ sender: UIButton) {
print("点击了手机登录按钮")
let t = SettingController()
navigationController!.pushViewController(t, animated: true)
}
@objc func primaryLoginAction(_ sender: UIButton) {
print("点击了用户名和密码登录按钮")
}
lazy var phoneLoginButton: UIButton = {
let r = UIButton(type: .system)
r.setTitle("手机登录", for: .normal)
r.addTarget(self, action: #selector(phoneLoginAction(_:)), for: .touchUpInside)
r.backgroundColor = .red
r.layer.cornerRadius = 5
r.setTitleColor(.white, for: .normal)
r.setTitleColor(UIColor(red: 0.9, green: 0.9, blue: 0.9, alpha: 1), for: .highlighted)
r.tg_width.equal(.fill)
r.tg_height.equal(42)
return r
}()
lazy var primaryLoginButton: UIButton = {
let r = UIButton(type: .system)
r.setTitle("用户名和密码登录", for: .normal)
r.addTarget(self, action: #selector(primaryLoginAction(_:)), for: .touchUpInside)
r.backgroundColor = .clear
r.layer.cornerRadius = 21
r.layer.borderColor = UIColor(red: 0.9, green: 0.9, blue: 0.9, alpha: 1).cgColor
r.layer.borderWidth = 1
r.setTitleColor(.red, for: .normal)
r.setTitleColor(UIColor(red: 0.9, green: 0.9, blue: 0.9, alpha: 1), for: .highlighted)
r.tg_width.equal(.fill)
r.tg_height.equal(42)
return r
}()
}
自定义 View
import UIKit
import TangramKit
class SettingView: TGRelativeLayout {
init() {
super.init(frame: CGRect.zero)
innerInit()
}
required init?(coder: NSCoder) {
super.init(coder: coder)
innerInit()
}
func innerInit() {
tg_width.equal(.fill)
tg_height.equal(55)
backgroundColor = .white
addSubview(iconView)
addSubview(titleView)
addSubview(moreIconView)
}
lazy var iconView: UIImageView = {
let result = UIImageView()
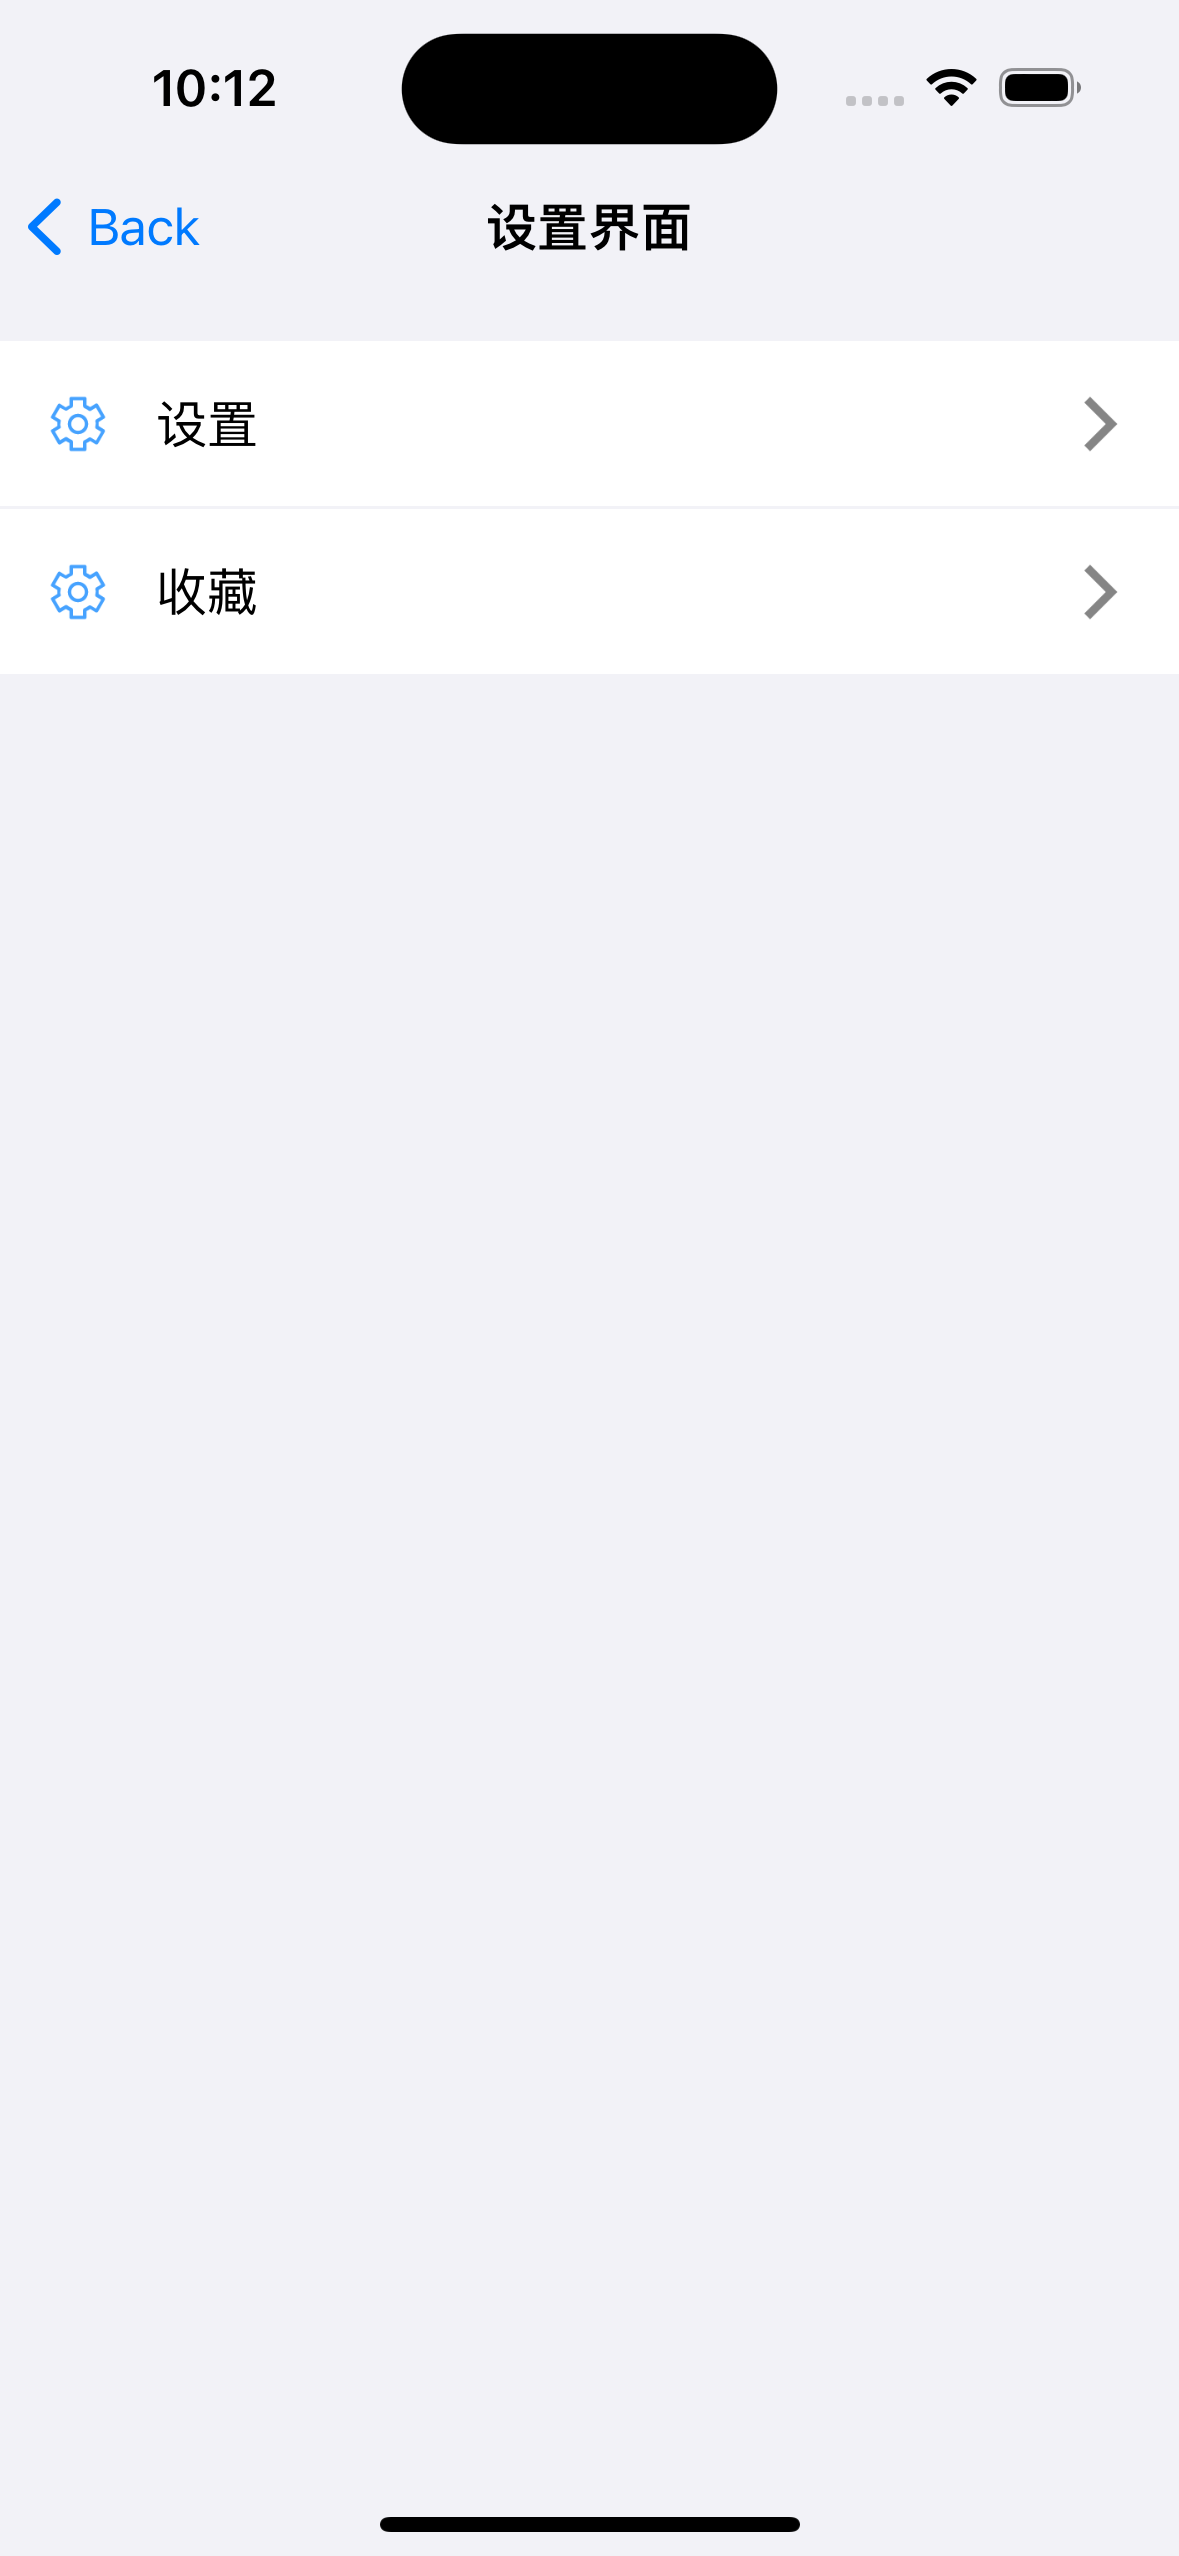
result.image = UIImage(named: "Setting")
result.tg_width.equal(20)
result.tg_height.equal(20)
result.tg_centerY.equal(0)
result.tg_leading.equal(16)
return result
}()
lazy var titleView: UILabel = {
let result = UILabel()
result.text = "设置"
result.tg_width.equal(.wrap)
result.tg_height.equal(.wrap)
result.tg_centerY.equal(0)
result.tg_leading.equal(iconView.tg_trailing).offset(16)
return result
}()
lazy var moreIconView: UIImageView = {
let result = UIImageView()
result.image = UIImage(named: "Arrow")
result.tg_width.equal(20)
result.tg_height.equal(20)
result.tg_centerY.equal(0)
result.tg_right.equal(16)
return result
}()
}
import UIKit
import TangramKit
class SettingController: UIViewController {
override func viewDidLoad() {
super.viewDidLoad()
view.backgroundColor = .systemGroupedBackground
title = "设置界面"
let container = TGLinearLayout(.vert)
container.tg_width.equal(.fill)
container.tg_height.equal(.wrap)
container.tg_top.equal(TGLayoutPos.tg_safeAreaMargin).offset(16)
container.tg_space = 1
container.addSubview(settingView)
container.addSubview(collectView)
view.addSubview(container)
}
@objc func onSettingClick(recognizer:UITapGestureRecognizer) {
print("onSettingClick")
}
lazy var settingView: SettingView = {
let r = SettingView()
r.addGestureRecognizer(UITapGestureRecognizer(target: self, action: #selector(onSettingClick(recognizer:))))
return r
}()
lazy var collectView: SettingView = {
let r = SettingView()
r.titleView.text = "收藏"
r.iconView.image = UIImage(named: "Setting")
return r
}()
}
参考资料